Simple Goat Enclosure for First Time Owners
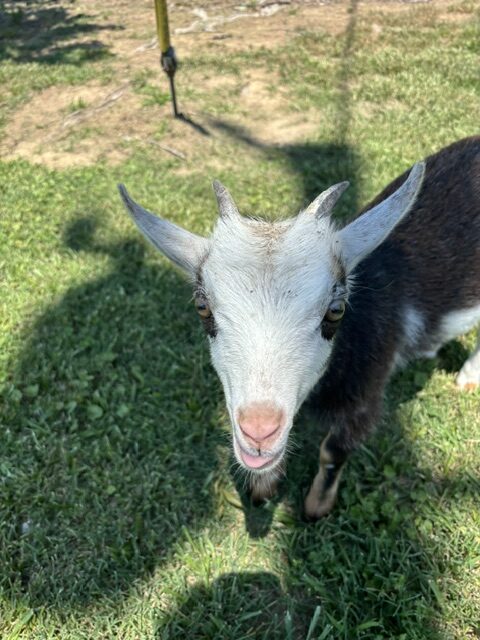
A little over a year ago, I was casually scrolling Facebook one afternoon when I came across an ad for the cutest baby goat. He was a Nigerian Dwarf/Pigmy bottle baby and I fell in love with him. I caught my husband in a weak moment, and he agreed that we should get him. A few hours later, that little fellow had a new home. Our kids were so surprised and they also fell in love with him immediately. They lovingly named him Otis (after the character on the Andy Griffith show). After doing some research, we found out that goats are companion animals, meaning that they are much happier if they have a friend. About a week later, we got another Pigmy bottle baby who we named Olive. We wanted a male and a female so that breeding could be an option in the future.
When we first brought the goats home, they were both about a week old so they were very small. We set up a dog pen that we had previously purchased in our shop so that we could easily access them when it came time for a bottle but also so they would be in an enclosed area and we wouldn’t have to worry about predators. However, we knew that they would quickly outgrow this area so we started planning and thinking about where to put them when it was time to move them outside. We already had a fenced in area with wooden plant beds that I had used several years ago for a garden. It was overgrown and really just an eye sore, so we decided that would be a good place for them until we could come up with something more permanent. Keep reading to see a list of the supplies we used and the steps we took to set up our goat fence.
Supplies
- 5 wood posts
- Cattle panels (the amount will depend on the size of the area you are fencing)
- T-posts
- Wire for attaching cattle panels to the t-posts
- Wood staples for attaching the panels to the wood posts
- Man gate
- T-post driver
- Post hole digger
Choosing Your Space and Materials
When planning for a permanent area, it’s important to keep in mind that goats really don’t need a ton of space, but they do need plenty of grass and they need some sort of shelter to protect against predators. The main focus of this post is on fencing an area in. The perfect area for us was a spot on the back of our property that joins one of the horse paddocks behind our shop. It also runs into our back yard so we can keep an eye on them, and since it’s closer to the house hopefully it will keep predators at bay as well.
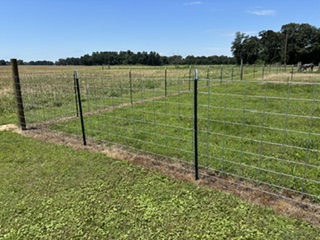
We chose to use cattle panels to fence in the area, but there are other options to consider such as welded wire. We used welded wire when we first fenced off the first paddock for the horses, and it was not easy to work with, plus it needs to be pulled tight and that requires more equipment. While cattle panels aren’t necessarily cheaper, we decided that the ease of putting it up made up for the extra expense.
Setting the Corner Posts and Gate Post
After you have the spot picked and have a layout, the first thing you need to do is set the corner posts. We used round posts for the corners to add more stability and help the fence have a longer life. Start with the first post at one corner. Dig a hole that is about 30 inches deep if using an 8-foot post using the post hole digger. If you have an auger attachment for a tractor, you could also use this instead of digging the hole manually (Side note: if you plan to do a large amount of fencing, investing in an auger is not a bad idea). Then drop the post in and start filling in with dirt. You can also fill the bottom of the post with a concrete mix to make it extra sturdy, but for goats just filling in with dirt should be fine. After filling the hole about a third of the way, use some sort of stick to tamp the dirt around the post and make sure it’s packed firm. We used an old tobacco stick, but anything slender and long with a blunt end will work. After you have tamped down around the post, continue filling with dirt and tamping as needed until the hole is filled and the post is secure. Once you have your first post set, you can use this as a guide to measure off of and set the other posts in the same way.
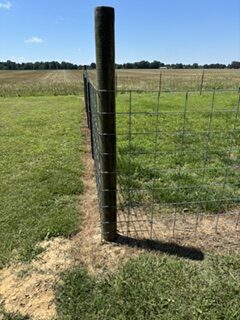
For the gate post, you will want to measure the width of your gate and set a post for the gate to swing on. I believe our gate is 4 feet wide, so we made the opening just a tad larger to accommodate the hinges and a gate latch. Set this post in the exact same way that you set the others. I would recommend using concrete to set this one since it will be holding the weight of the gate.
Setting the T-post and Attaching the Cattle Panels
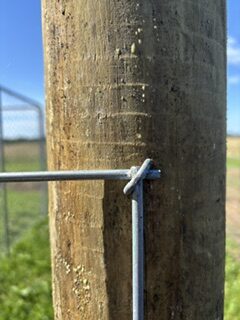
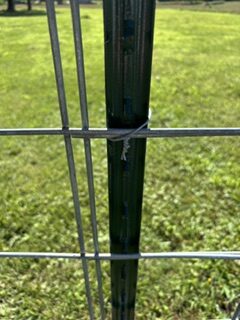
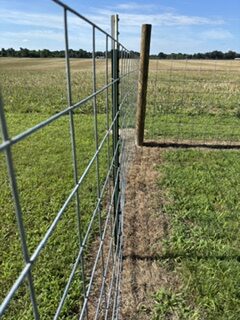
After the corners are set, then you can go in and set the t-post using the t-post driver. To set the t-posts, measure 8 feet from the corner post and then set one in 8-foot intervals down the line until you reach the next corner post. Do this on all four sides. After all the t-posts are set, you are ready to set up the panels. When setting the first panel, you will want to attach one end to the outside of the wood post using the wood staples, and the run the rest of the panel on the inside of the t-posts. The reason it needs to be on the inside of the t-post is so that if the goats decide to rub or push against the fence, it will be more stable. To attach the panel to the t-post, cut 8-to-10-inch pieces of wire and, using plyers, twist the ends until the wire is tight and the panel is secured to the t-post.
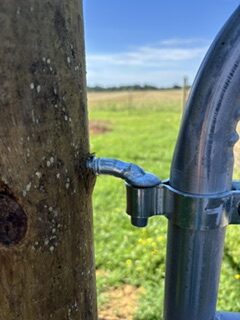
Once the cattle panels have all been set up, you can then install the gate on the gate post. We have found that it’s easiest to set the gate in between the posts and mark where the hinges need to be. Then take a drill and drill out two holes in the places you marked. If you measured correctly, your gate should sit on the hinges easily and be pretty level. If the gate isn’t level, you can adjust the gate by shortening or lengthening the hinges. The gate comes with a chain that you can use to latch, which is what we currently have but we plan to install a gate latch soon simply because it’s easier to open when your hands are full with feed buckets.
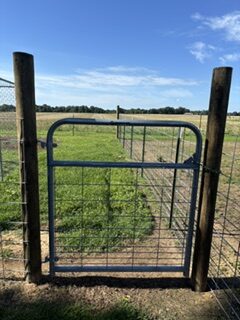
Success!
Congratulations! You’ve just given your goats a great space to run and play while keeping them contained. In your fence, you can provide slides, old tires, or balls for the goats to play with and jump on. They are very playful animals and love to have high places to jump and slide. Providing play areas not only will keep them entertained but will also up the entertainment factor and personal enjoyment that you get from watching them. Also, they will need some kind of shelter to protect them from the weather and predators. Stay tuned for a post coming on building your own easy and cheap goat shelter!